
Registration Site FAQ
First time using the registration site? Click here.
Returning user who has an account? Login and click here.
Need to remove events from your shopping cart? Click here.
Need to check past orders? Click here.
1. Enter your email address in the field under “Create an Account”
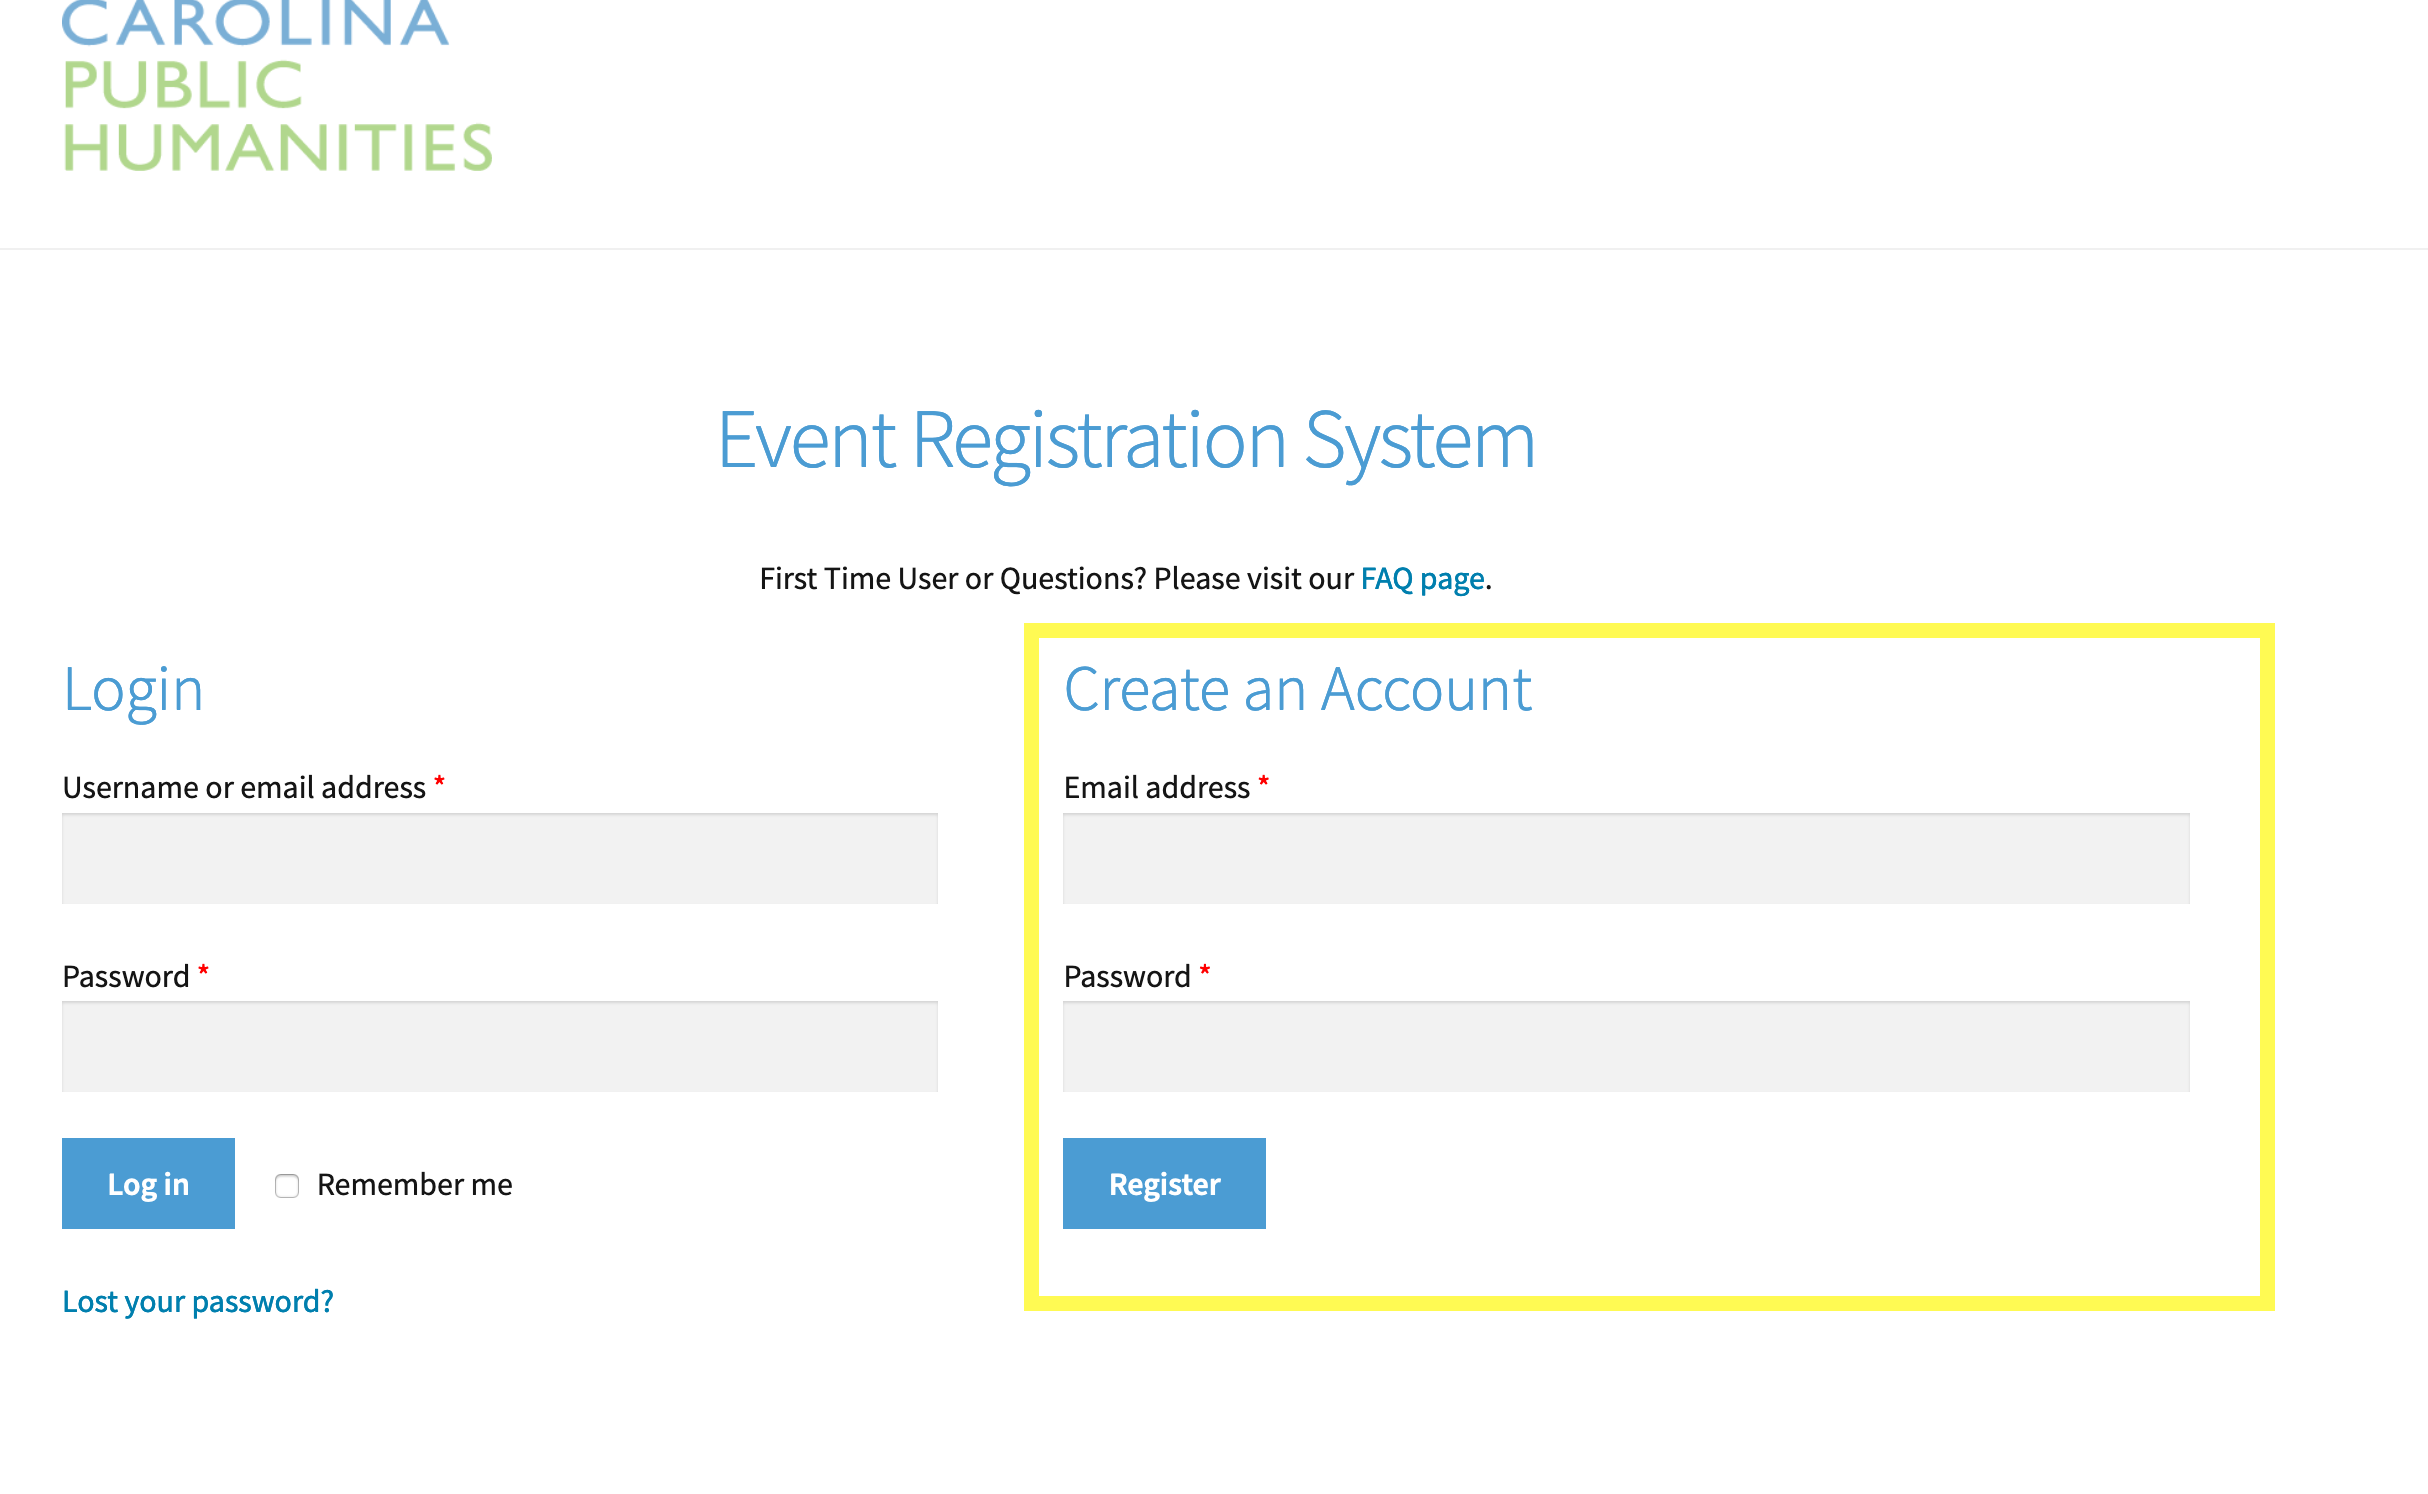 (click image to expand)
2. Create a secure password that you’ll remember.
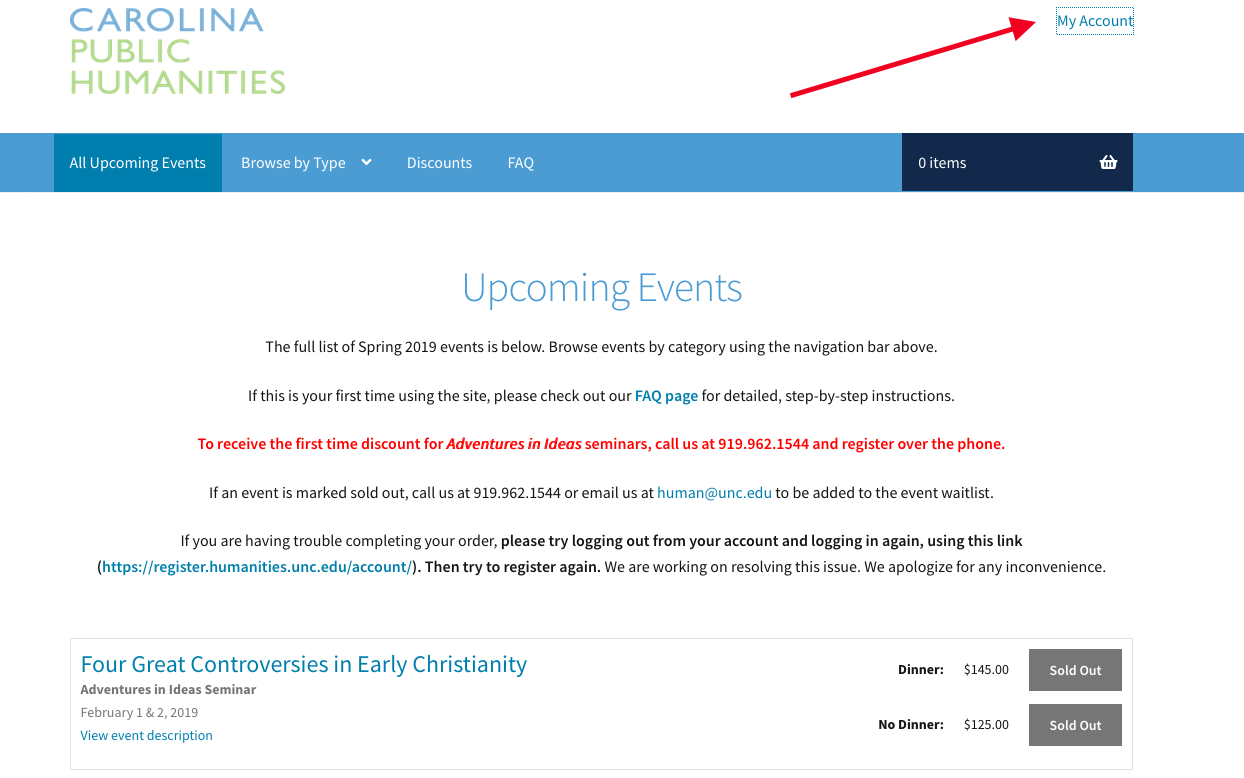
3. Once you’ve set up a new account, click “My Account” in the upper right hand corner of the shopping cart.”
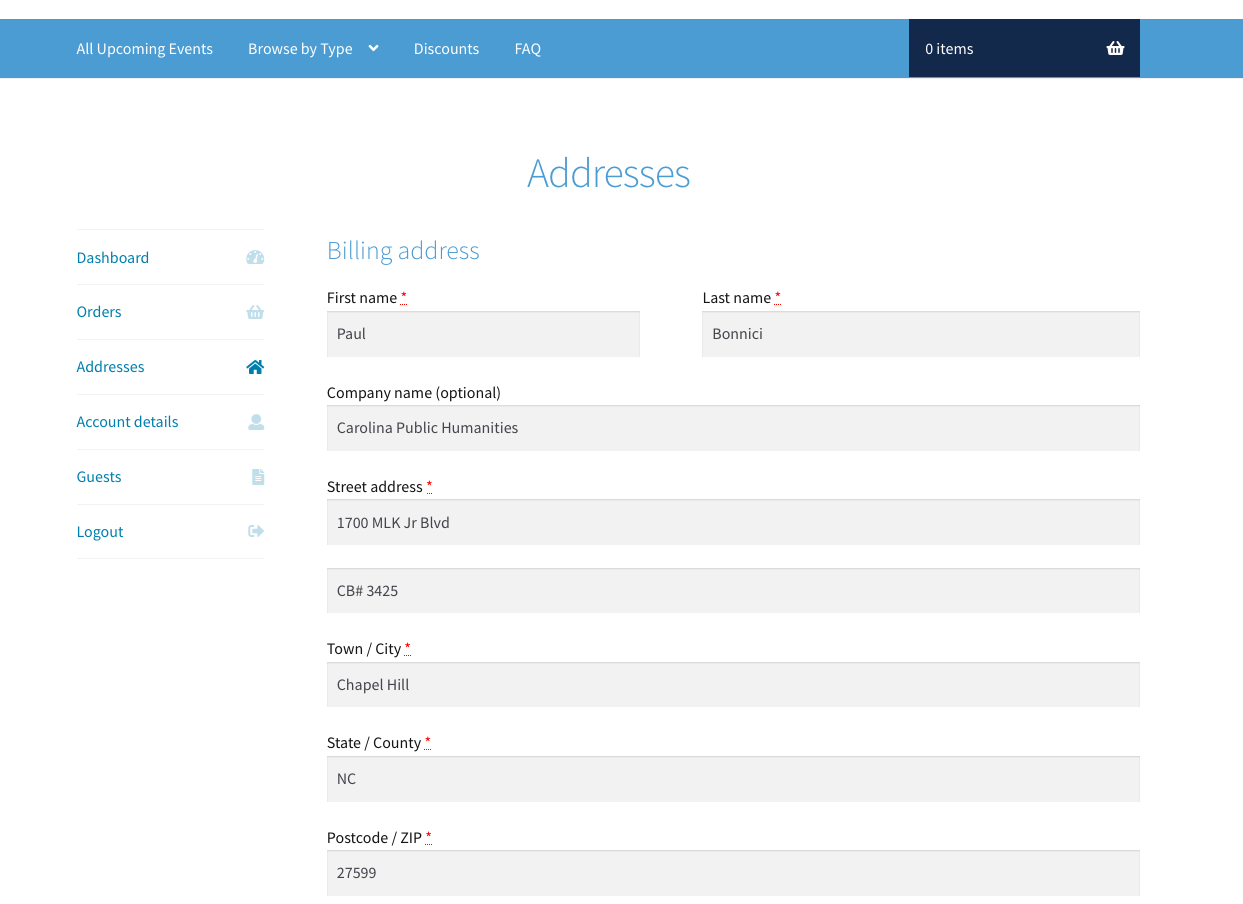
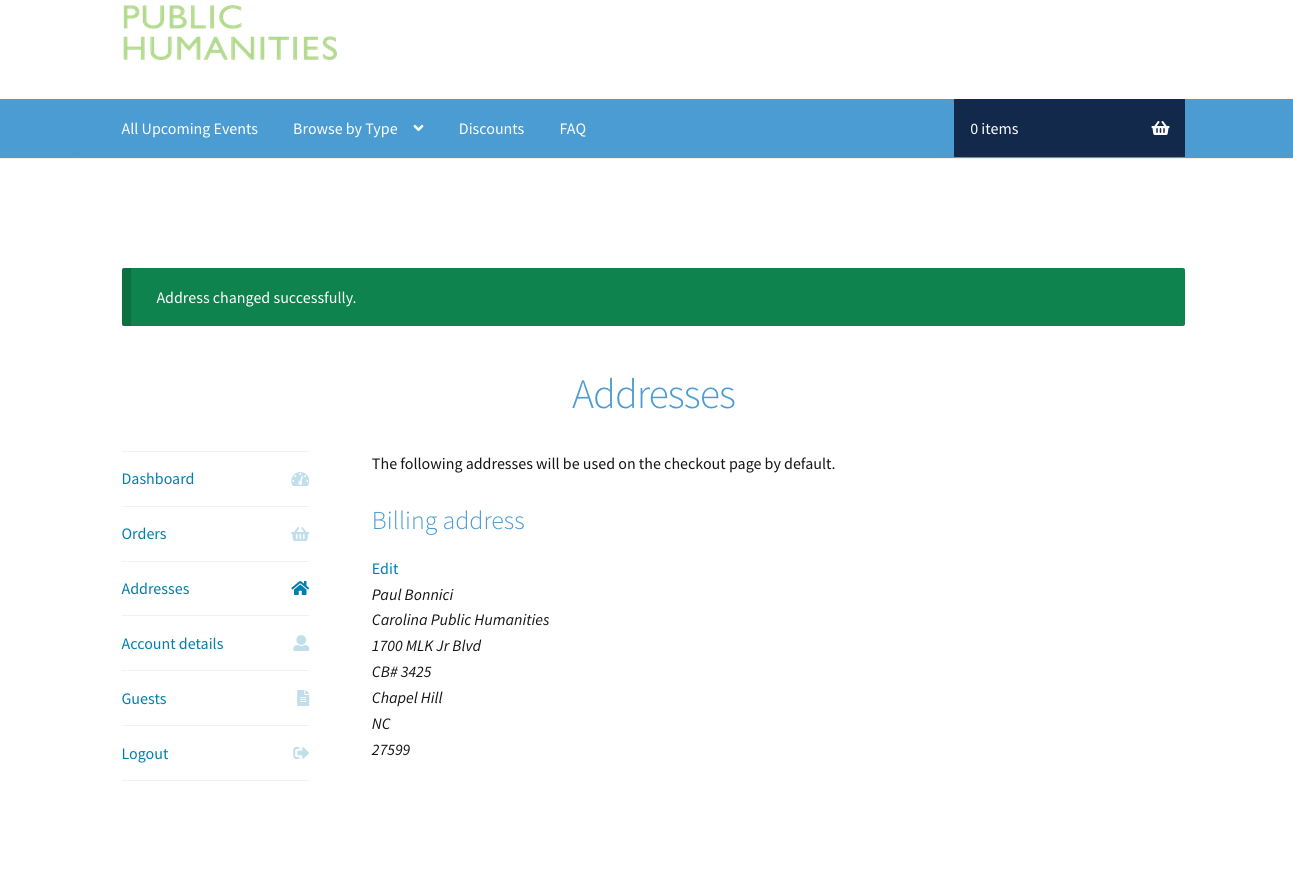
4. Click the “Address” button on the left hand side of the page. On the next screen enter all the required information (Name, Address, Email, etc.) and hit “Save Address.” If you did it correctly, you should return to the my account page and a green bar with the message “Address changed successfully”
 —->
—->  —->
—-> 
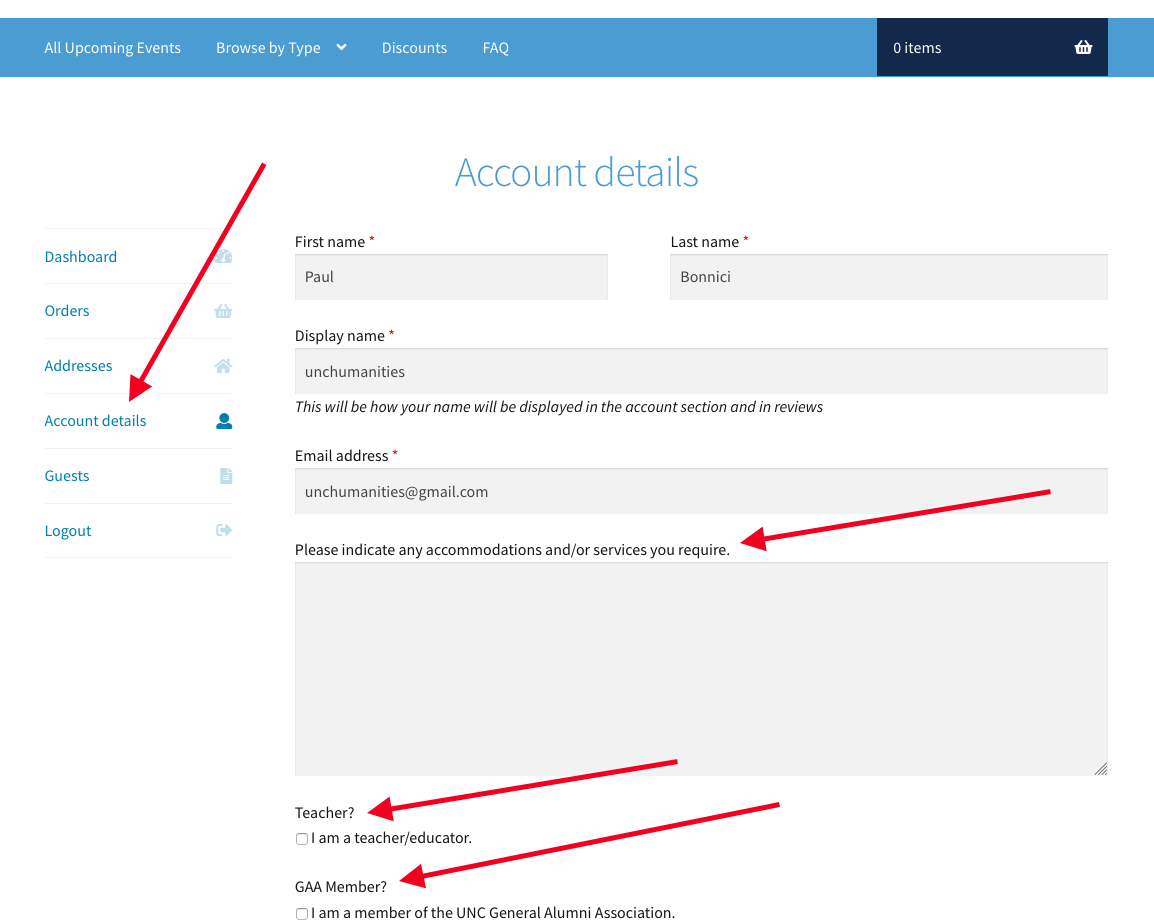
5. If you are a teacher, UNC General Alumni Association (GAA) member, or required special accommodations, click “Account Details” on the left hand menu. Complete the fields that apply to you and hit the “save changes” button at the bottom of the page. (If you are a GAA member, be sure to selected your membership type or else the discount will not be applied at checkout.)
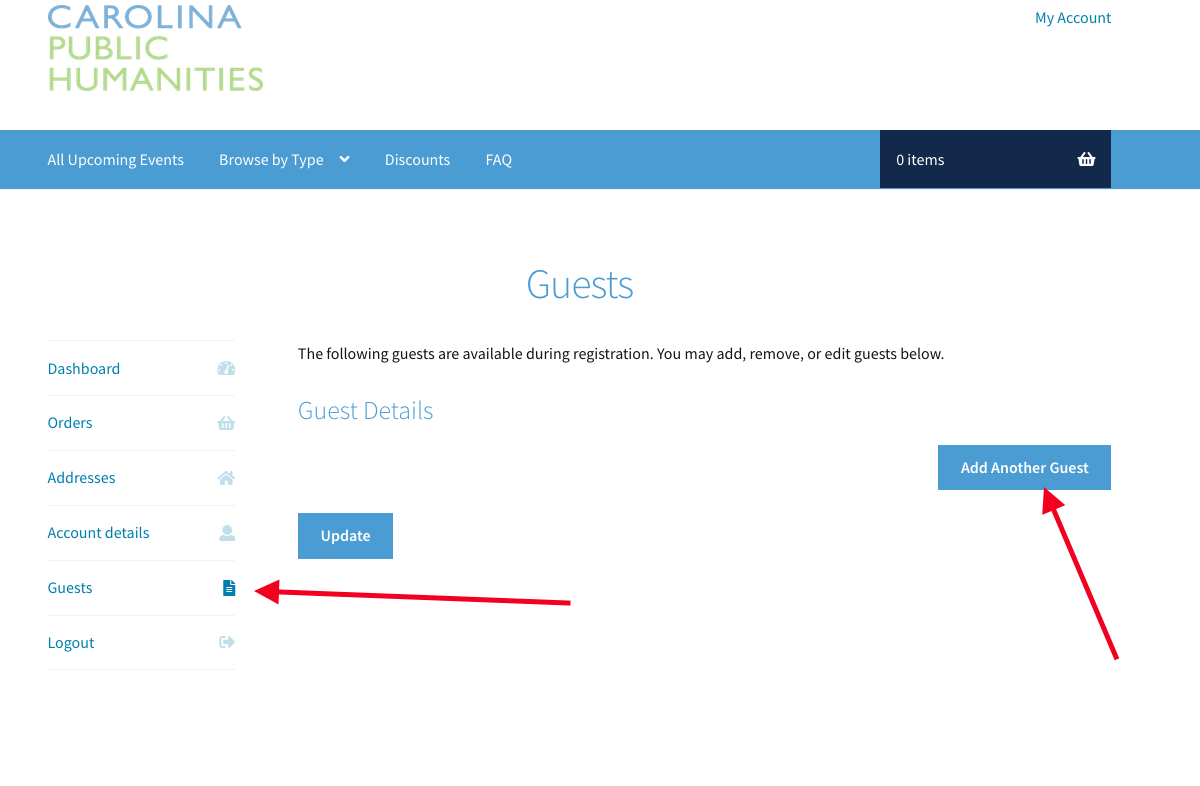
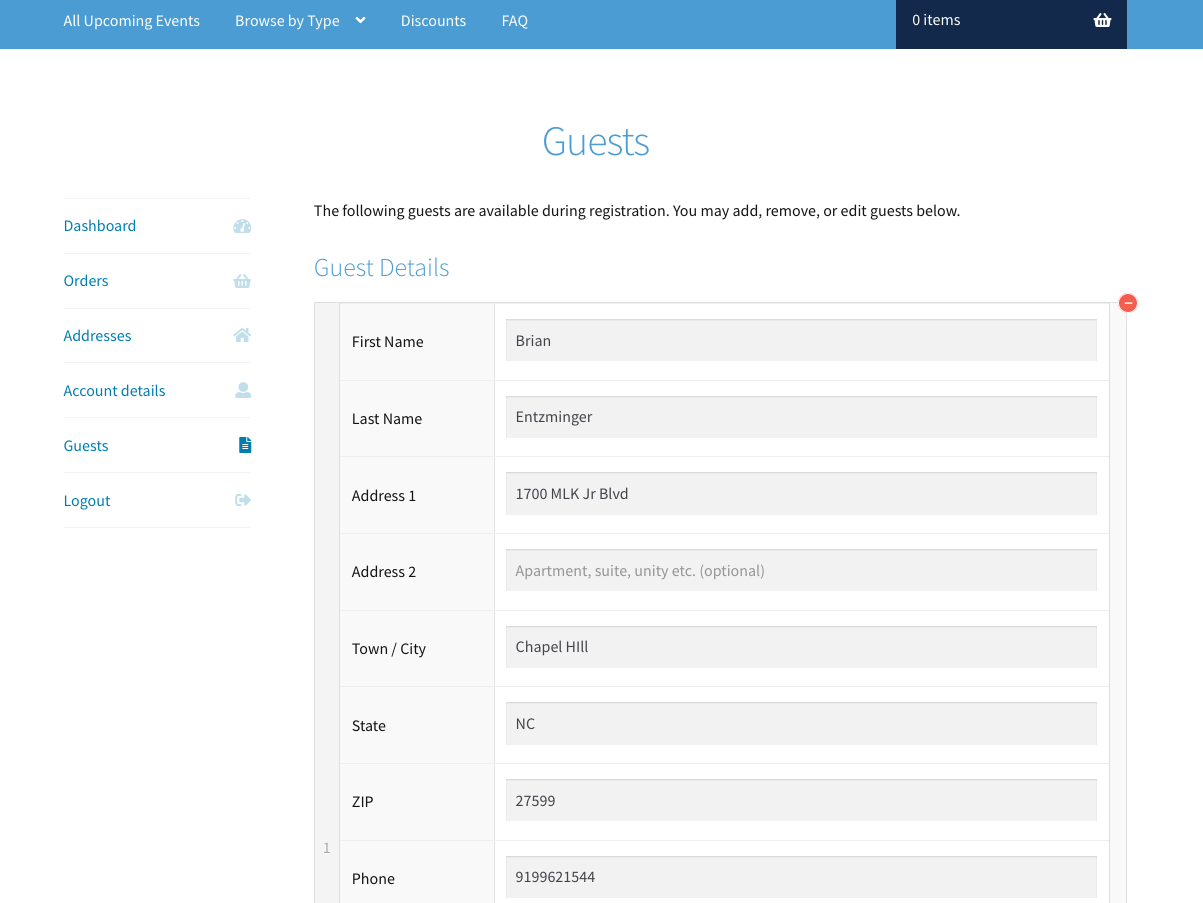
6. If you would like to add a guest (such as a spouse, partner, or friend) to your account, click “Guests” on the left hand menu. Next, click “Add Another Guest” to bring up a new form. Complete all the required information and hit “update.” That person will now be linked to your account and you can choose them as a ticket holder during checkout.
 —->
—-> 
7. Once you’ve set up all your account information, click the Carolina Public Humanities logo in the upper left hand corner of the page to return to the shopping cart.
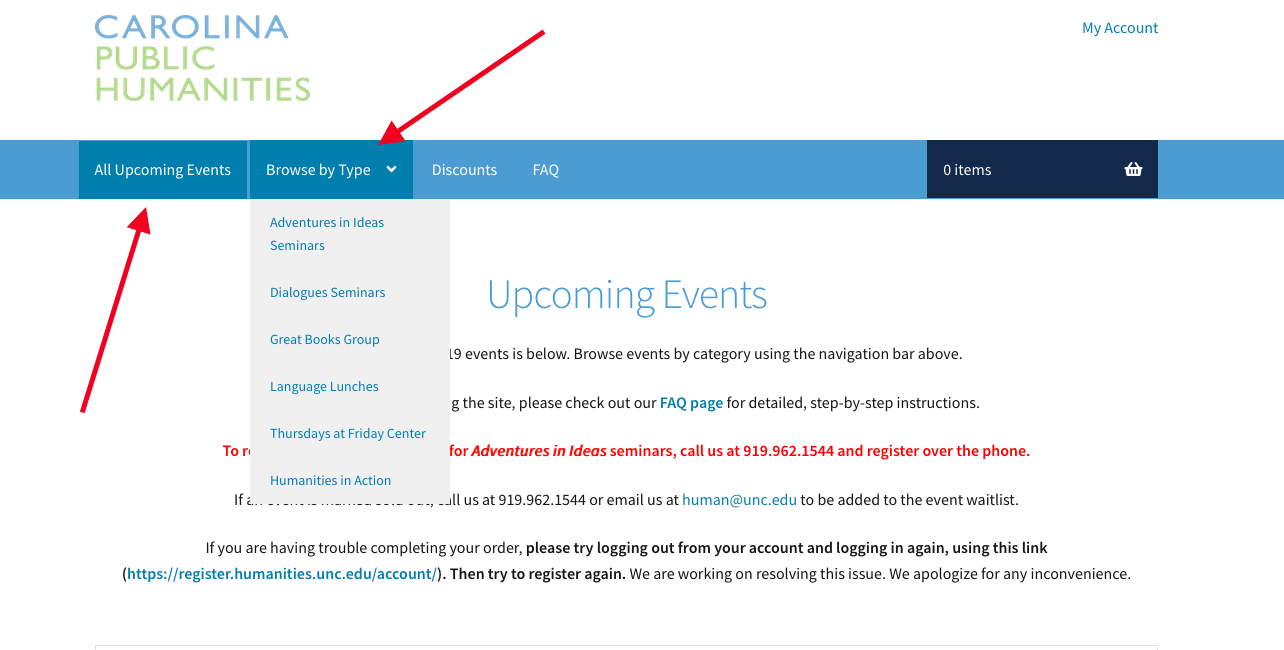
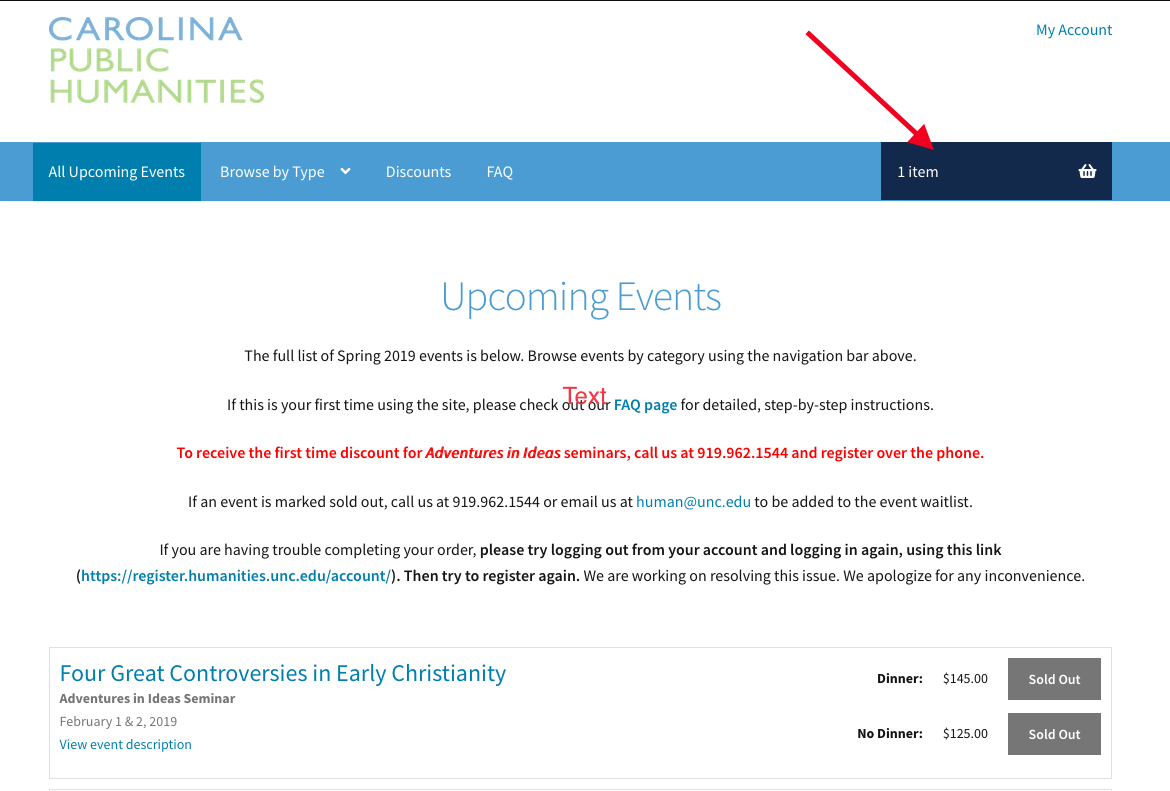
8. Once you’ve set up a new account or logged in, there are two ways to browse events:
- Click the “Upcoming Events” button in the top menu to view all of our programs by date
- Click the “Browse by Type” button in the top menu to access the list of our programs. Click the program type you’re interested in to bring up a list of just those programs.
9. To Register for an Event:
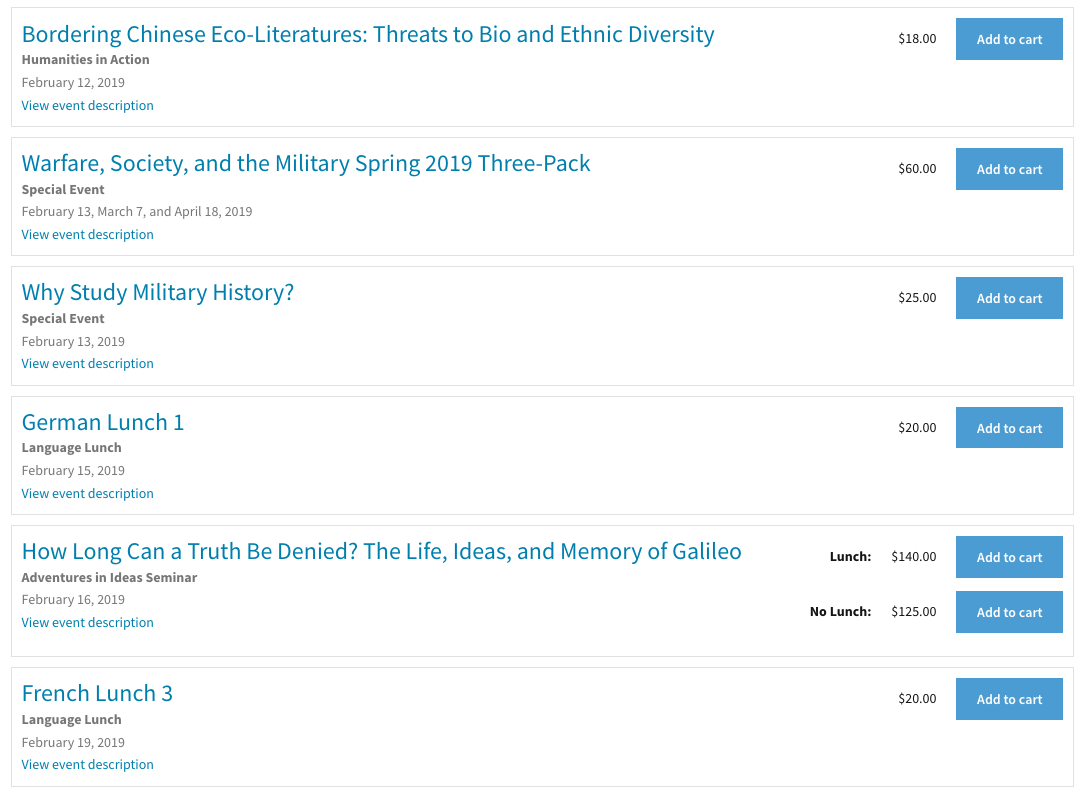
Find the event(s) you would like to register for. Click the “Add to Cart” button to the right of the event title. This selects one seat for you.
- If you would like to add more seats, click the + on the right hand side of the button.
- If you want to remove that event, click the – until the button says “Add to cart”
- If an event is marked “Sold Out” call us at 919.962.1544 or email us at human@unc.edu to be added to the event waitlist.
Certain events offer an optional meal. If you would like to forgo the optional meal, click the “no lunch” or “no dinner” button.
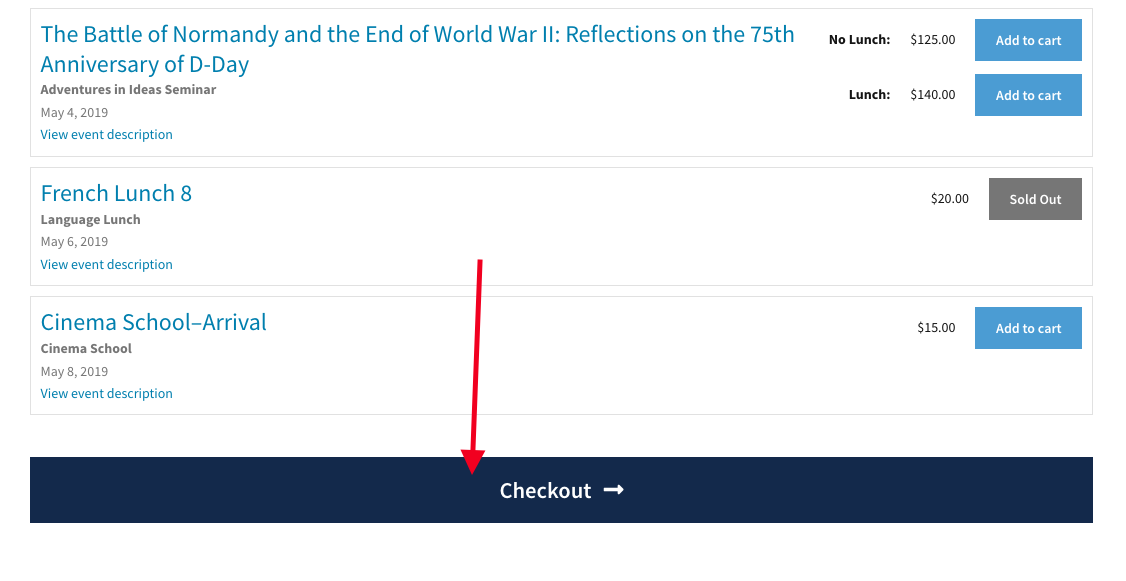
10. Once you have selected all the events you would like to register for, click the “Checkout” button in the top menu or the bottom of the page.
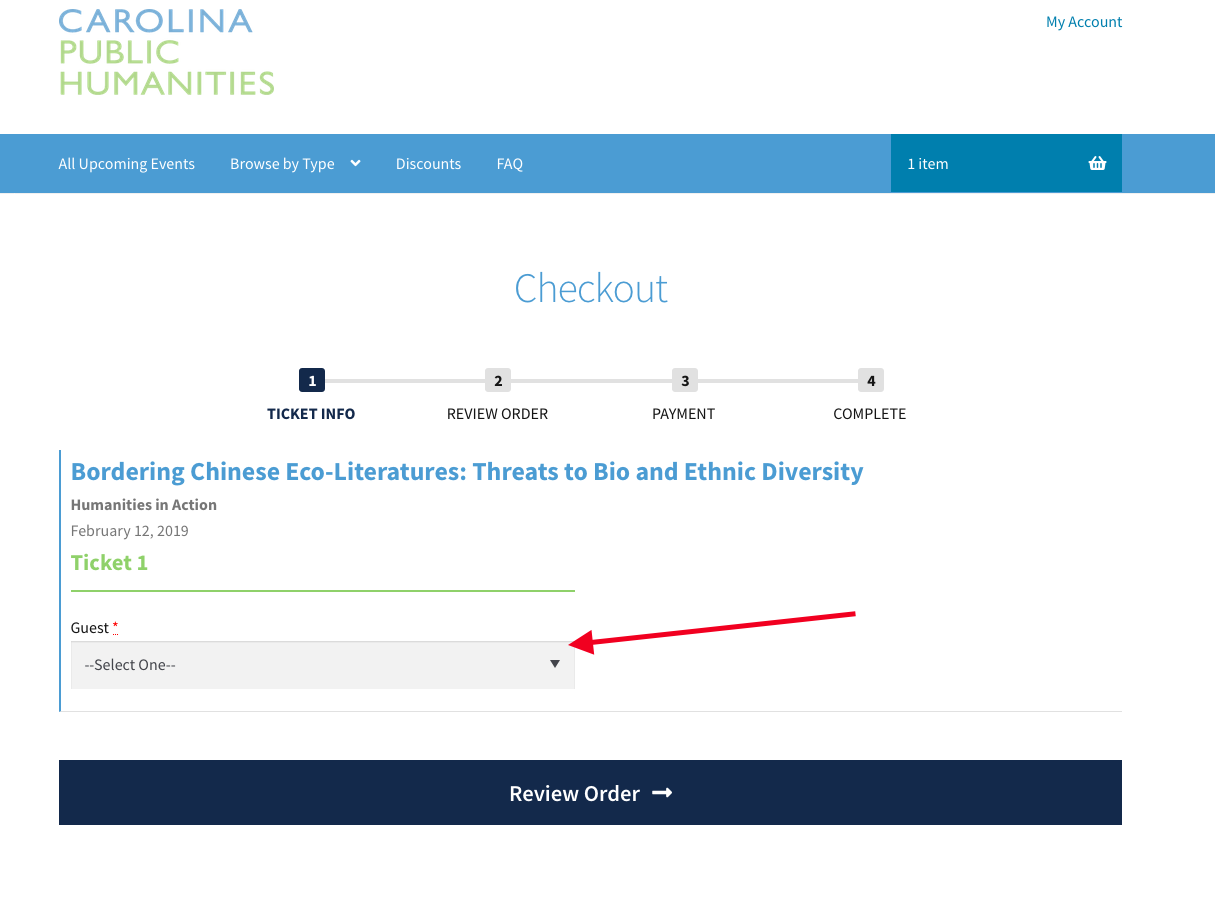
Checkout page
11. Under each event, click the drop down box under “Guest.” If your account is already setup, select your name and/or your guest’s name for each event listed to autocomplete your information in the form. Click “review order” when you have finished assigning a person to each event ticket.
 —->
—-> 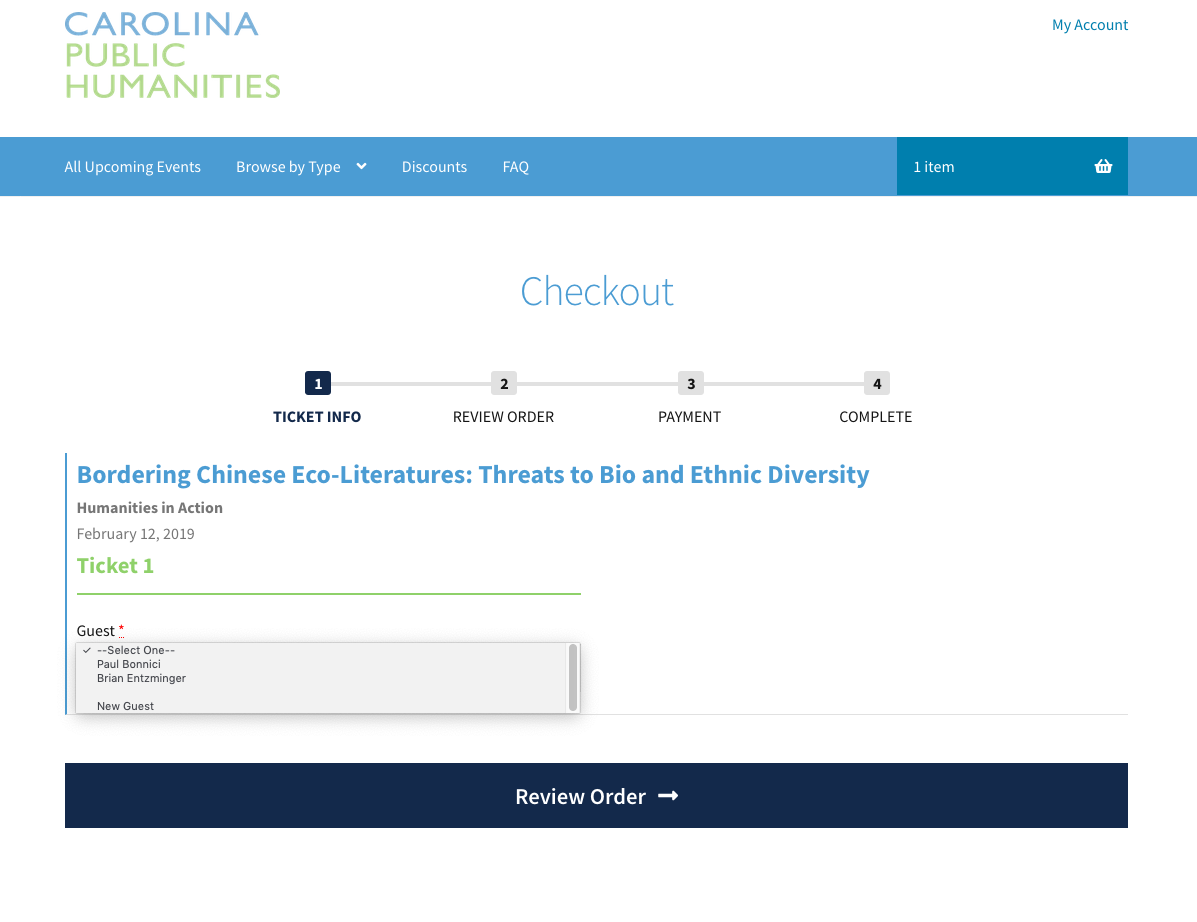
11a. If you did not setup your account or would like to add a new guest, click “new guest” to bring up new fields. You must complete all the boxes with a red star. The ones without a red star are optional. Once you have completed the form, click “Update Guest Info.” For each subsequent event, click the drop down box and your name or your guest’s name should appear. Click “review order” when you have finished assigning a person to each event ticket.

Review Order Page
12. Review your order to make sure your discounts (see below) have been applied. If everything looks good, click the proceed to payment button to take you to an external, secure credit card processing site.
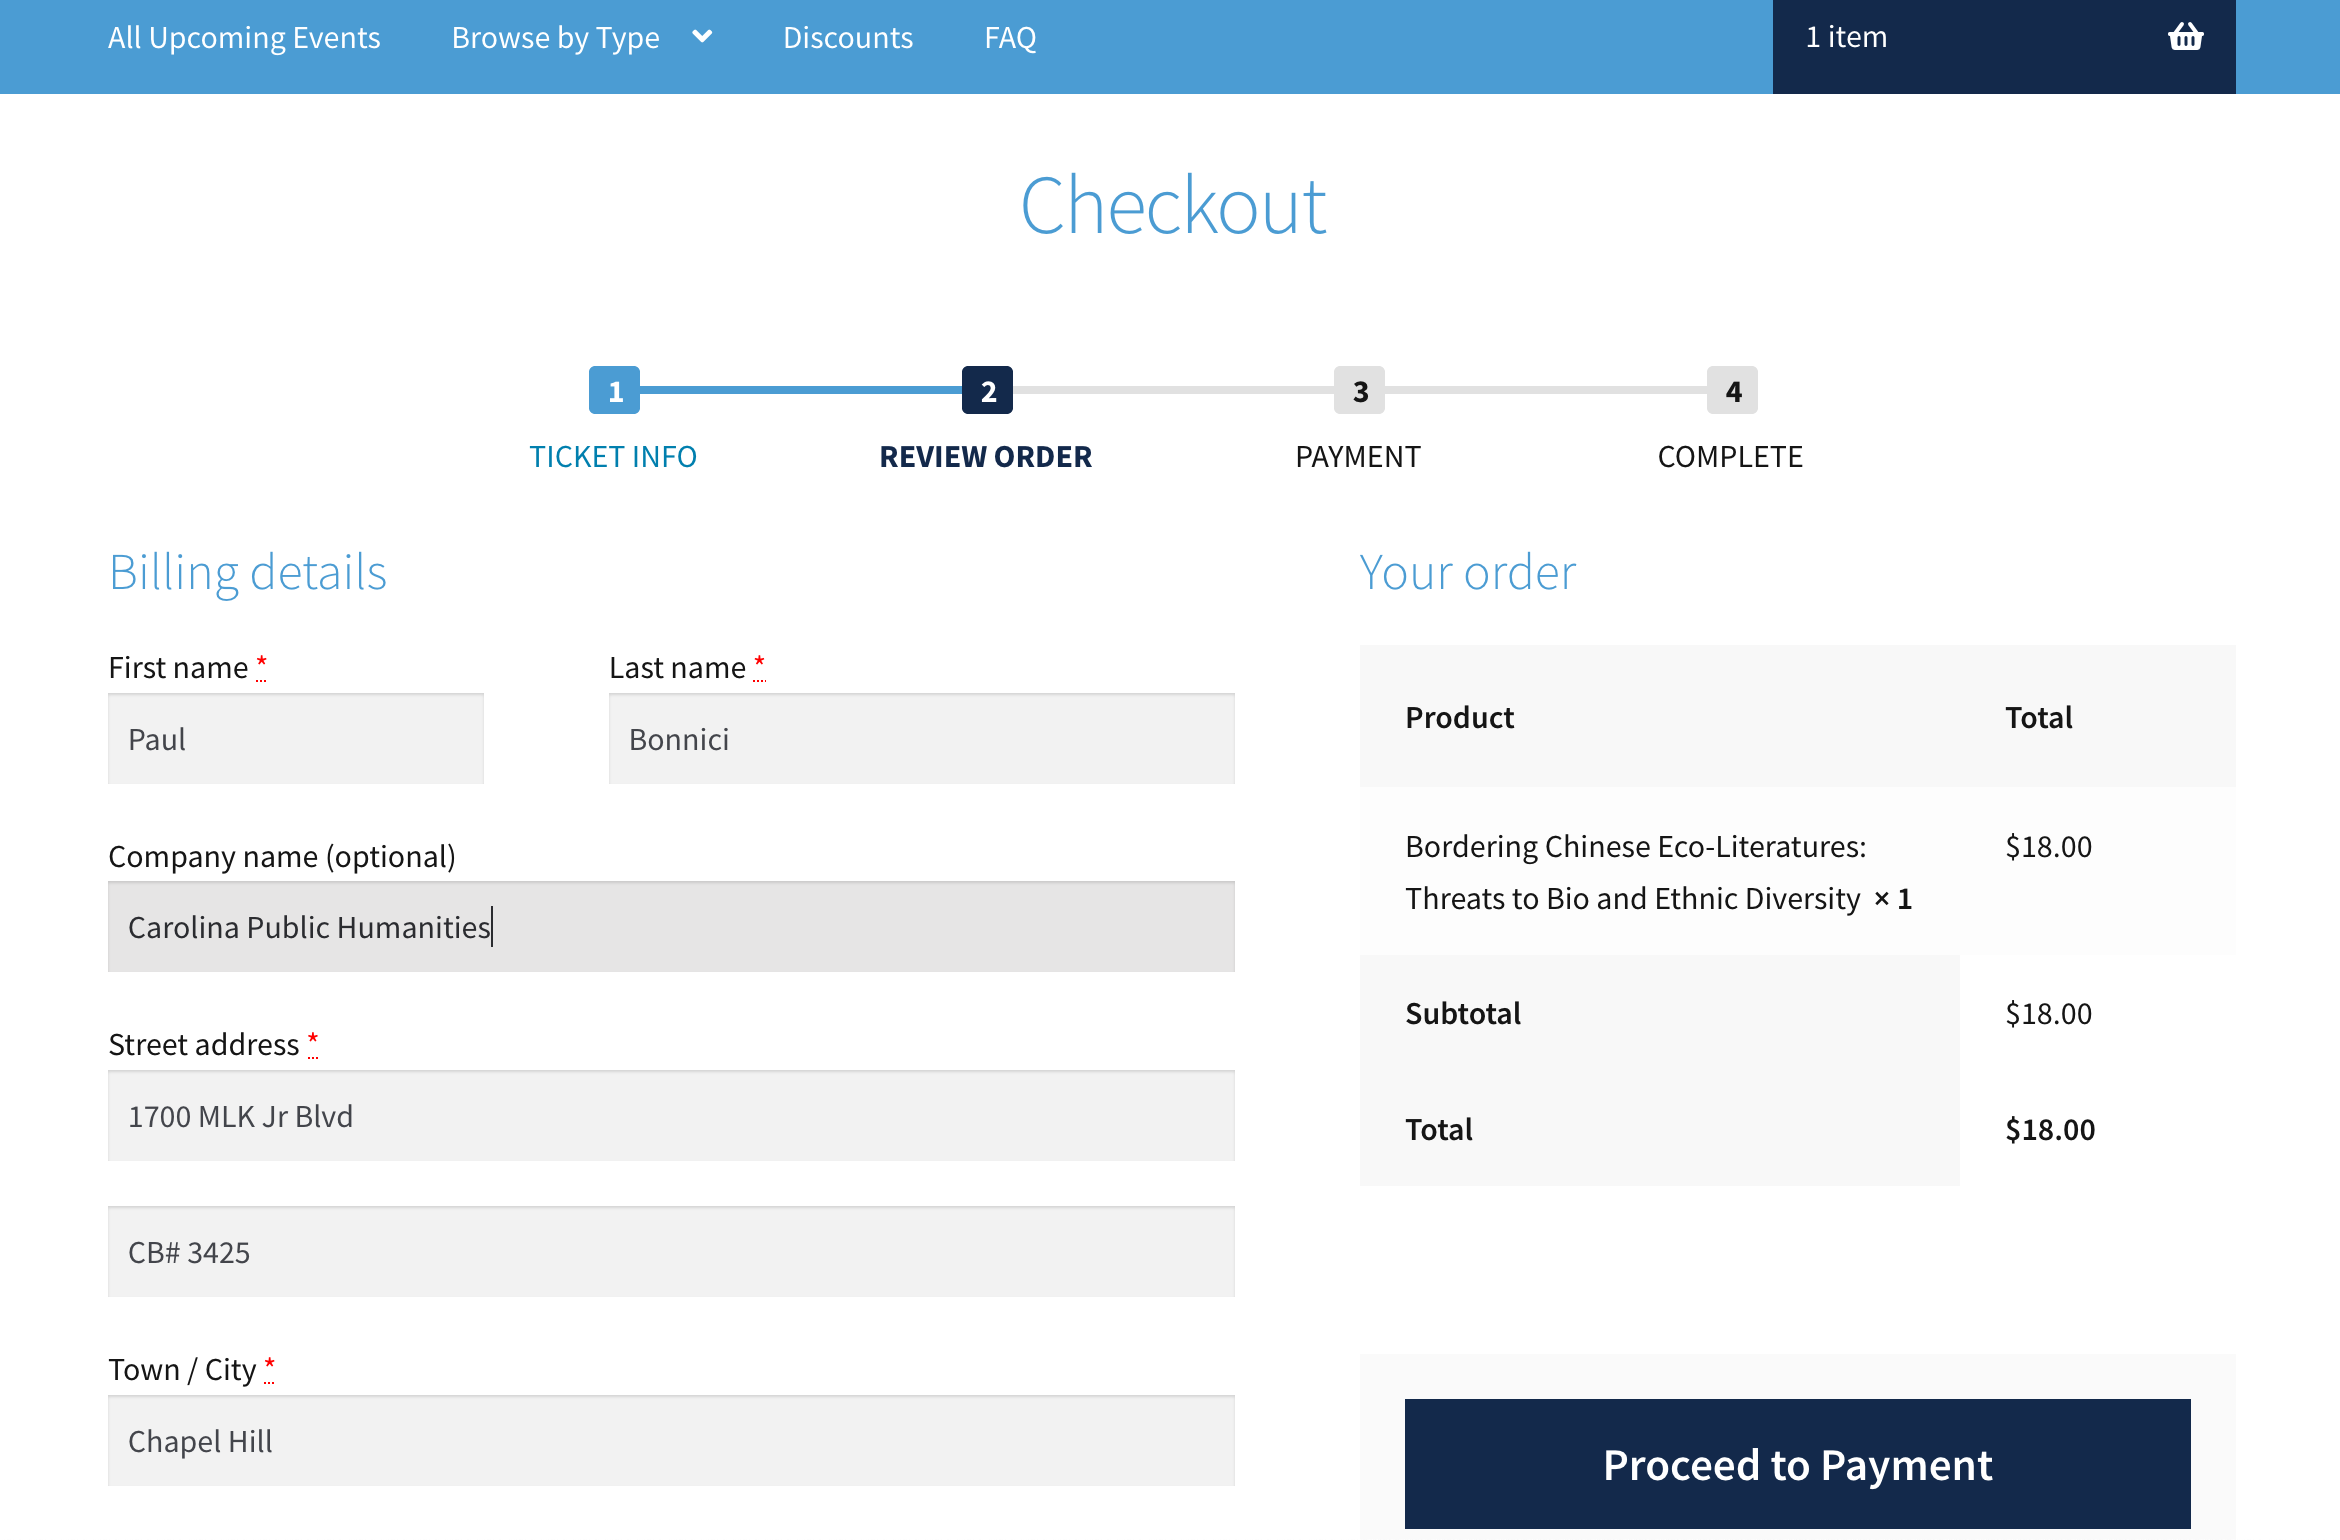
**Some users have been experiencing a spinning wheel when trying to checkout. We’re aware of this problem and we’re working with the developers to resolve it. Some users have reported that refreshing the page after a minute or two allowed their orders to proceed to the credit card processing site. If that doesn’t work, please call us at 919.962.1544 between 9am and 5pm, Monday-Friday. We apologize for any inconvenience.*
Discounts
Events that are eligible for discounts will have those options listed below the ticket. Select the appropriate discount and complete the information requested for the discount to be applied at checkout. Please note that the first time discount and the UNC/Faculty Staff discounts are not eligible online. To receive those, call us at 919.962.1544 to register.
Payment
13. Enter your credit card information into UNC’s secure TouchNet site. All of your billing information should already be entered into the credit card payment form. Once you have entered your credit card information, click “continue” to process the order. You should receive a “Notification of Payment” email from lerch@unc.edu once your order has been processed.
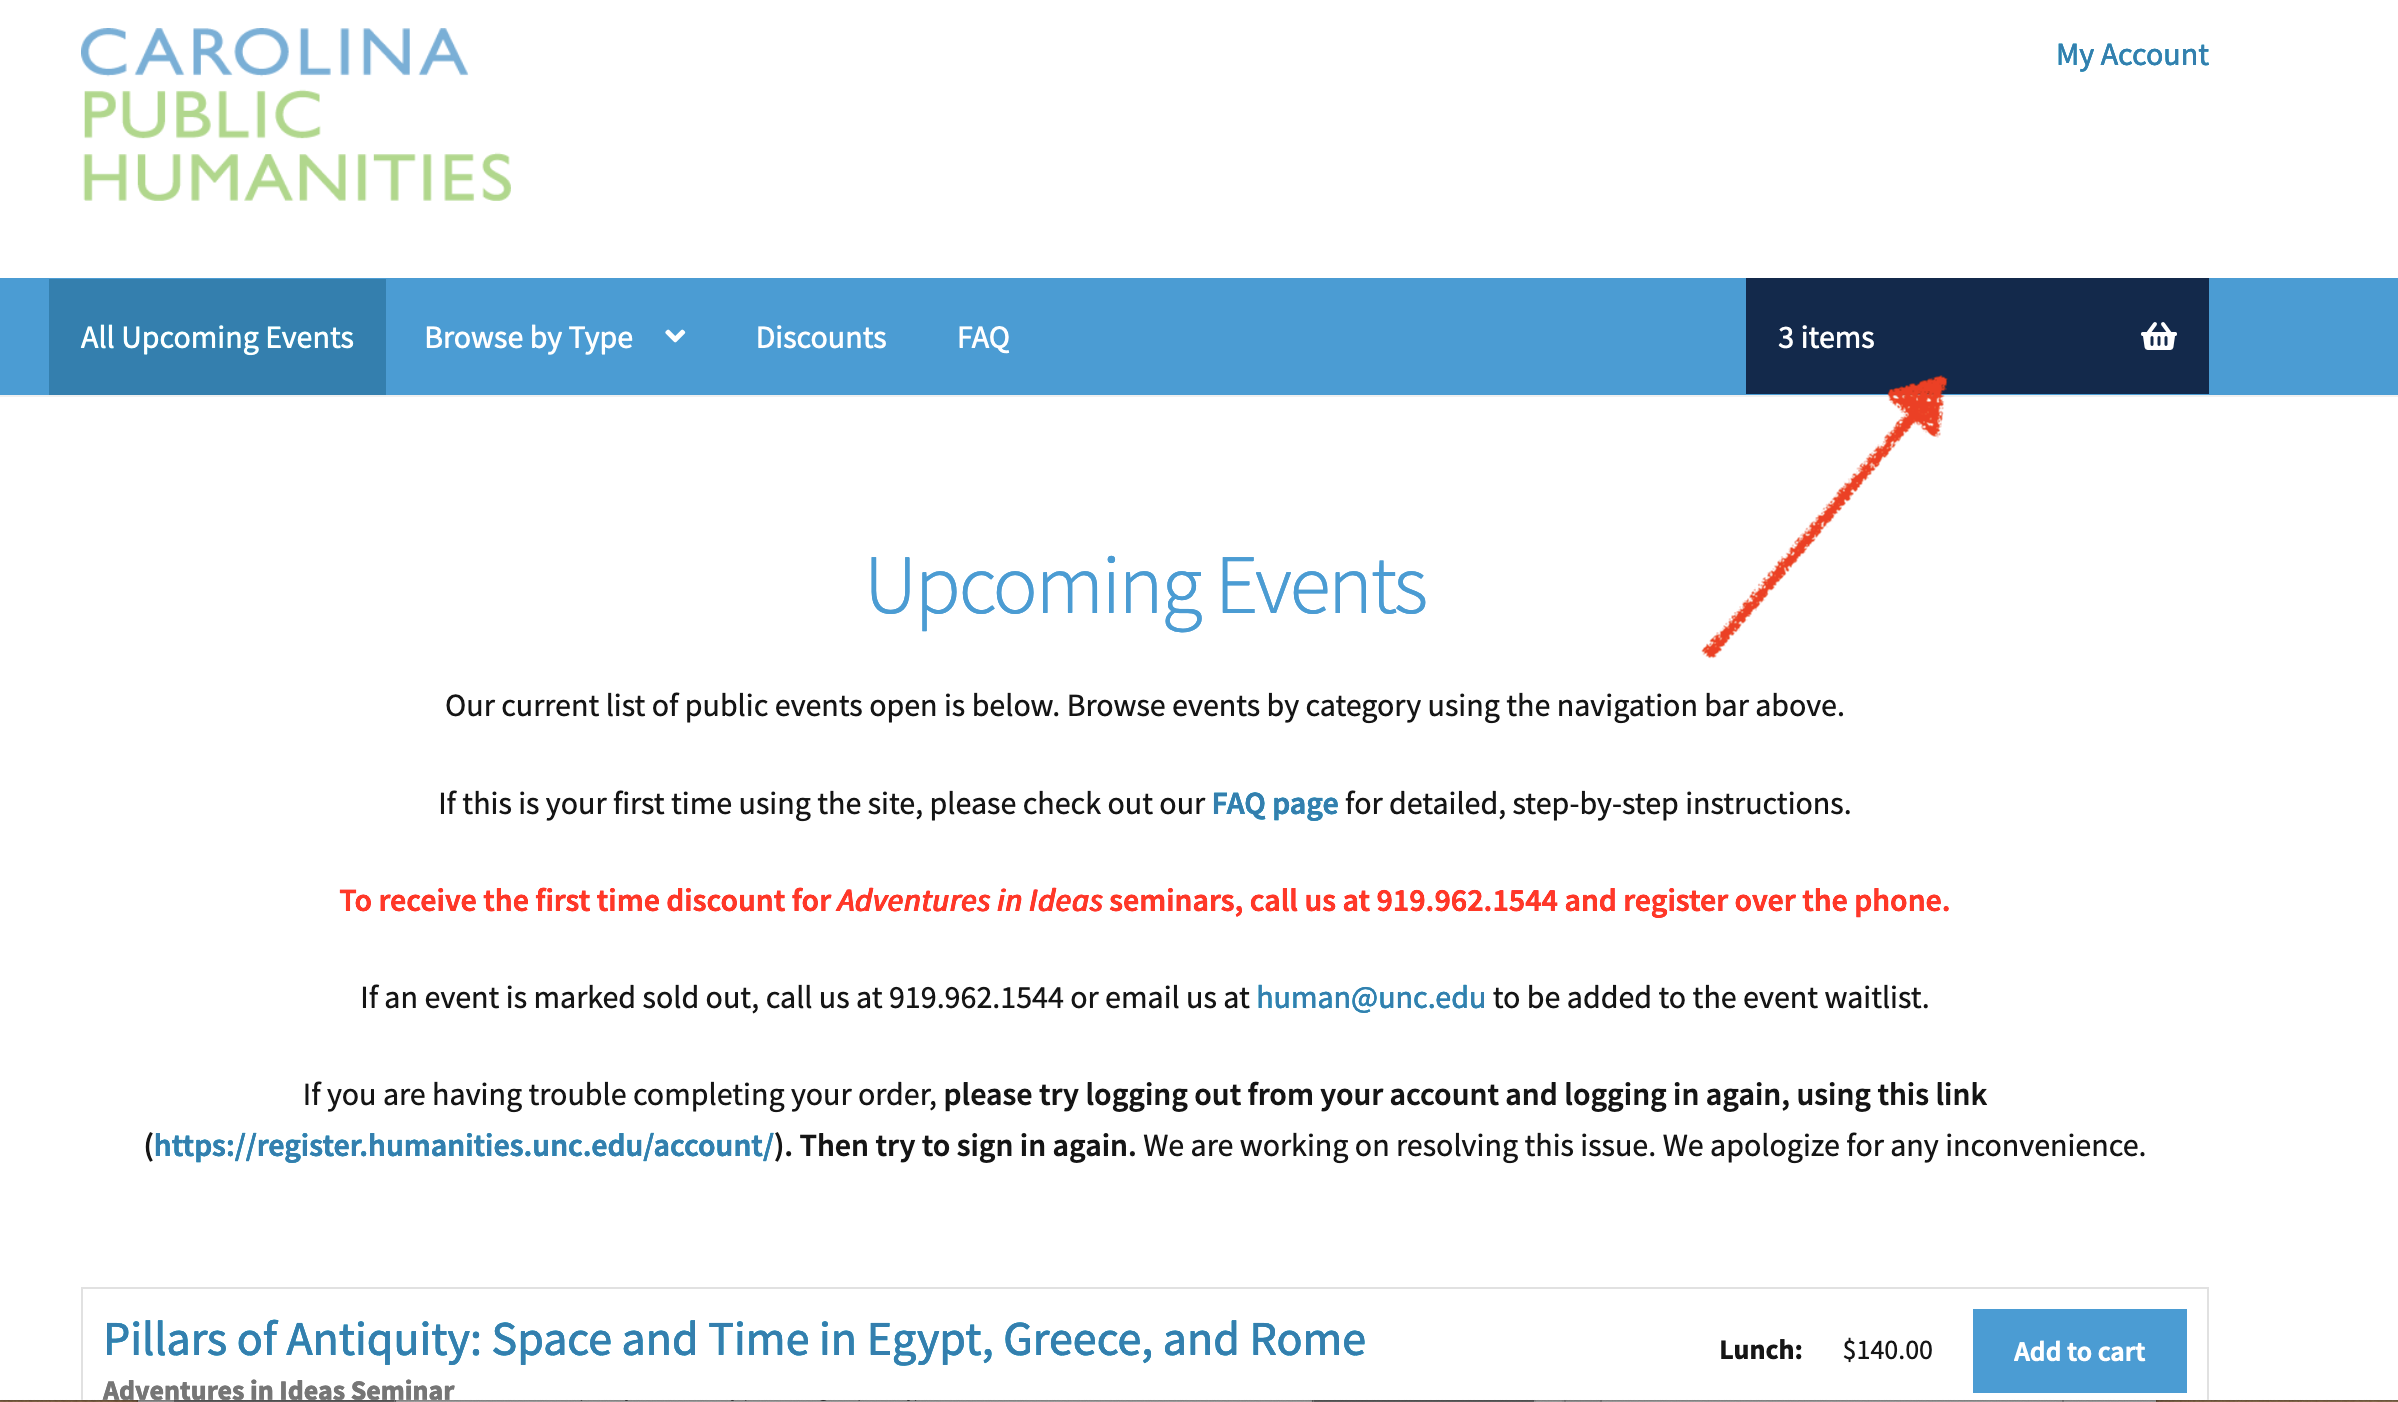
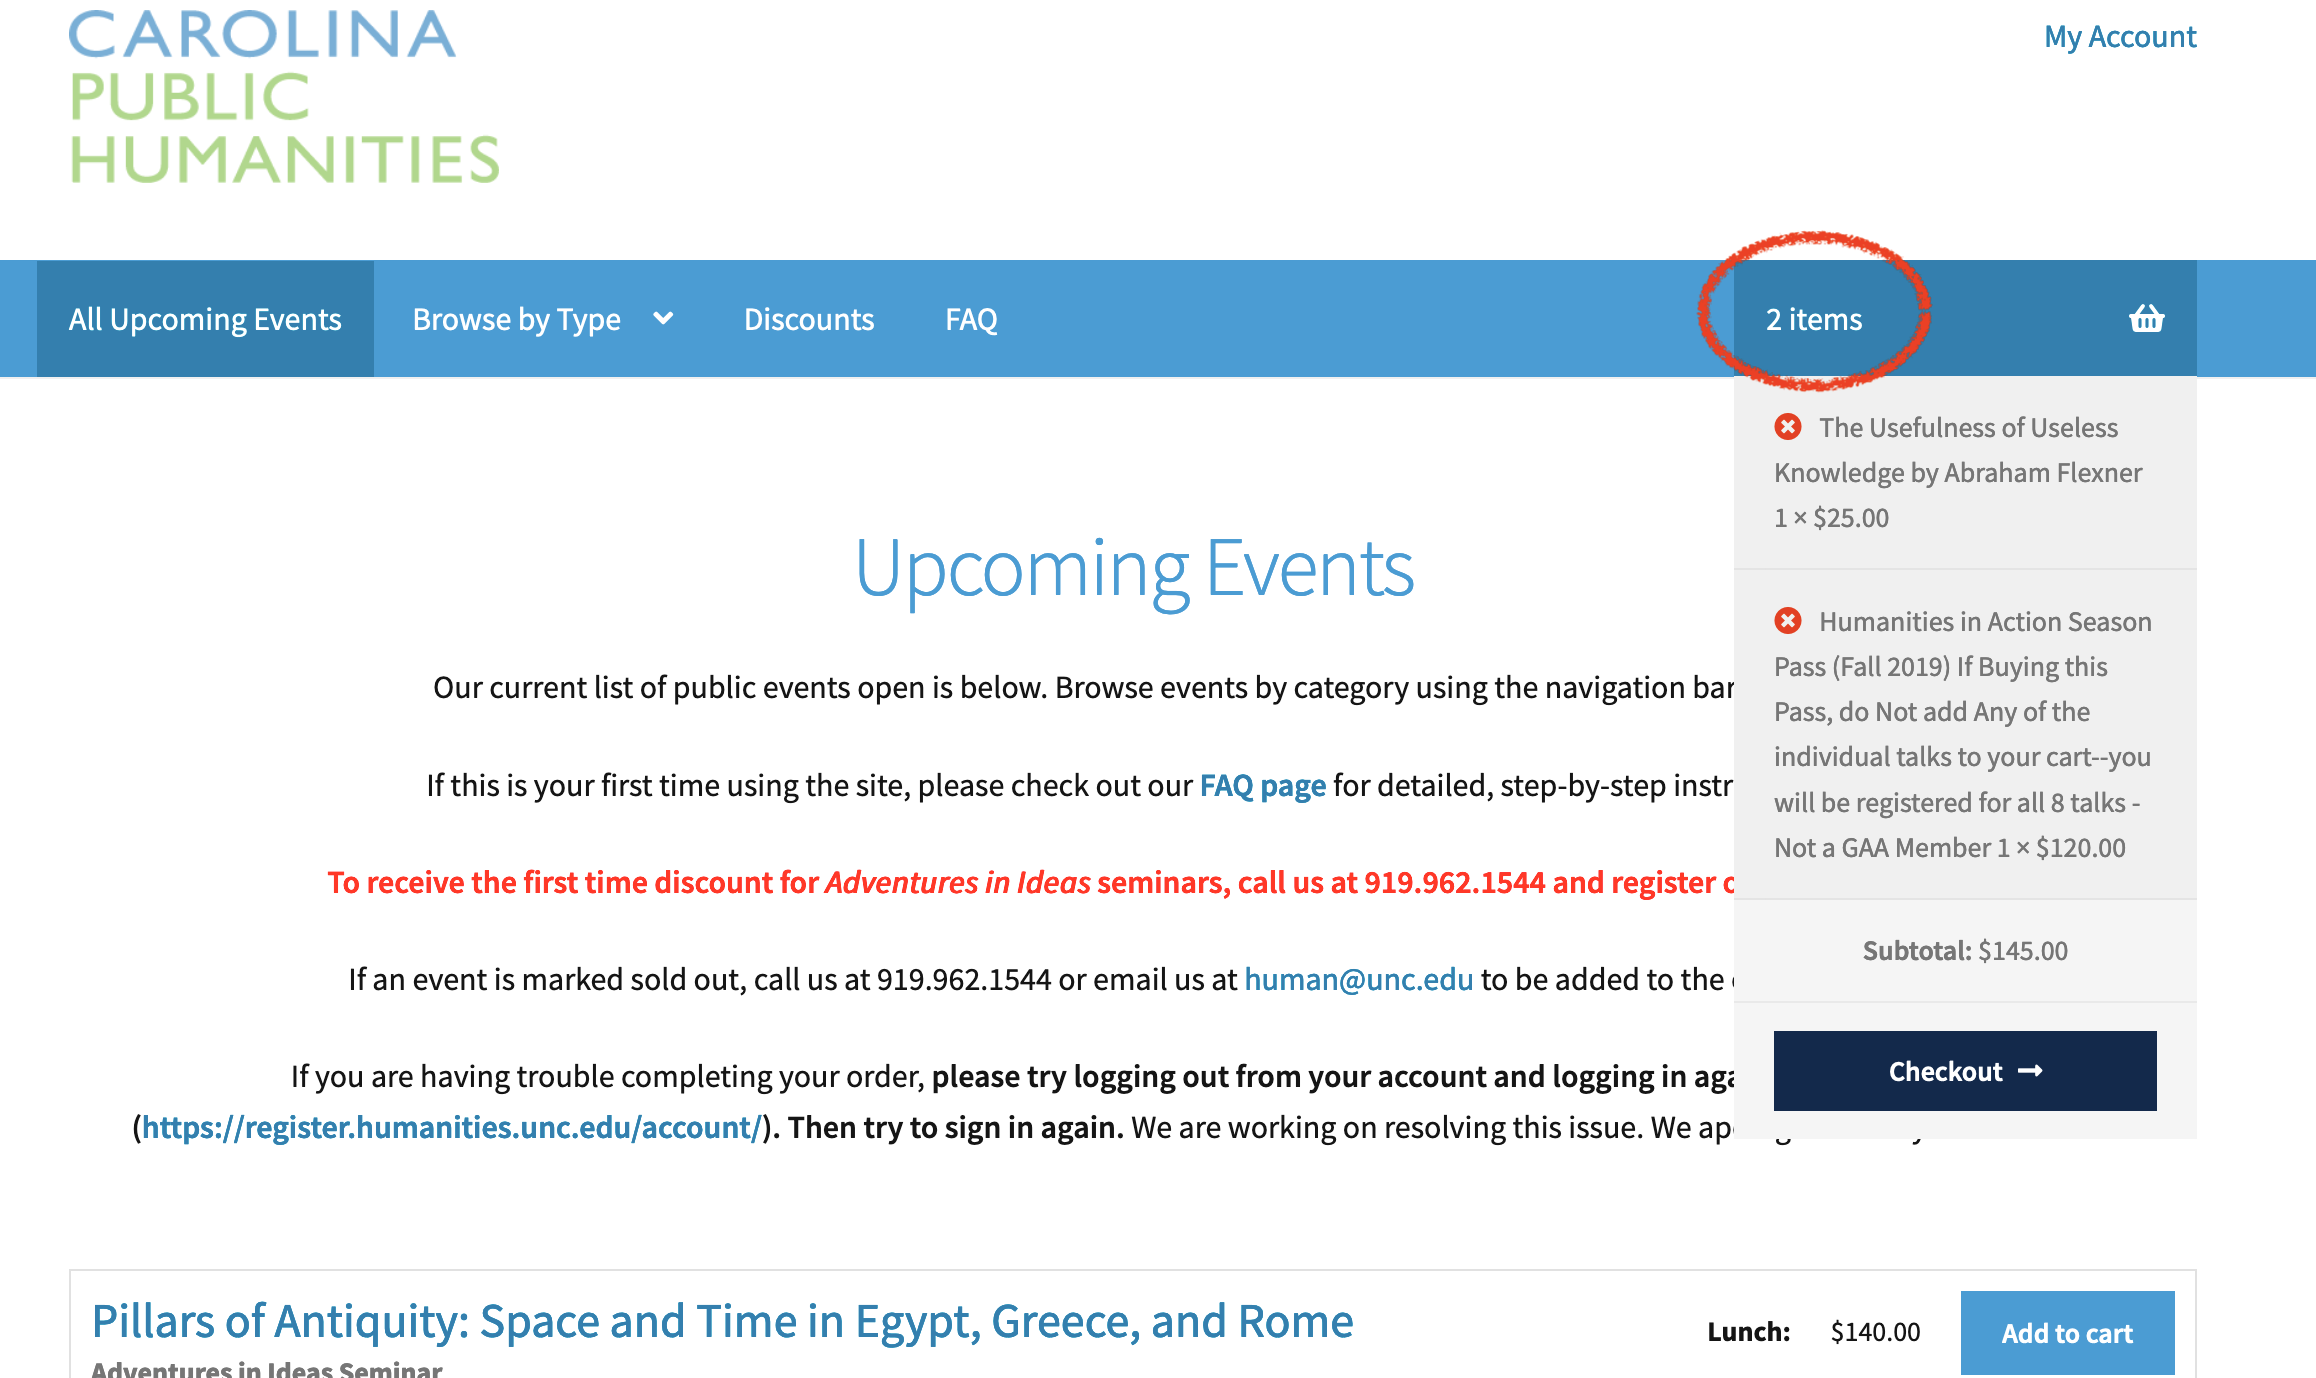
To remove events from your cart, click the dark blue box with the basket icon in the top right corner.
This will bring up a drop down box listing all of the items in your shopping cart. Click the red “x” to the left of the event you wish to remove.
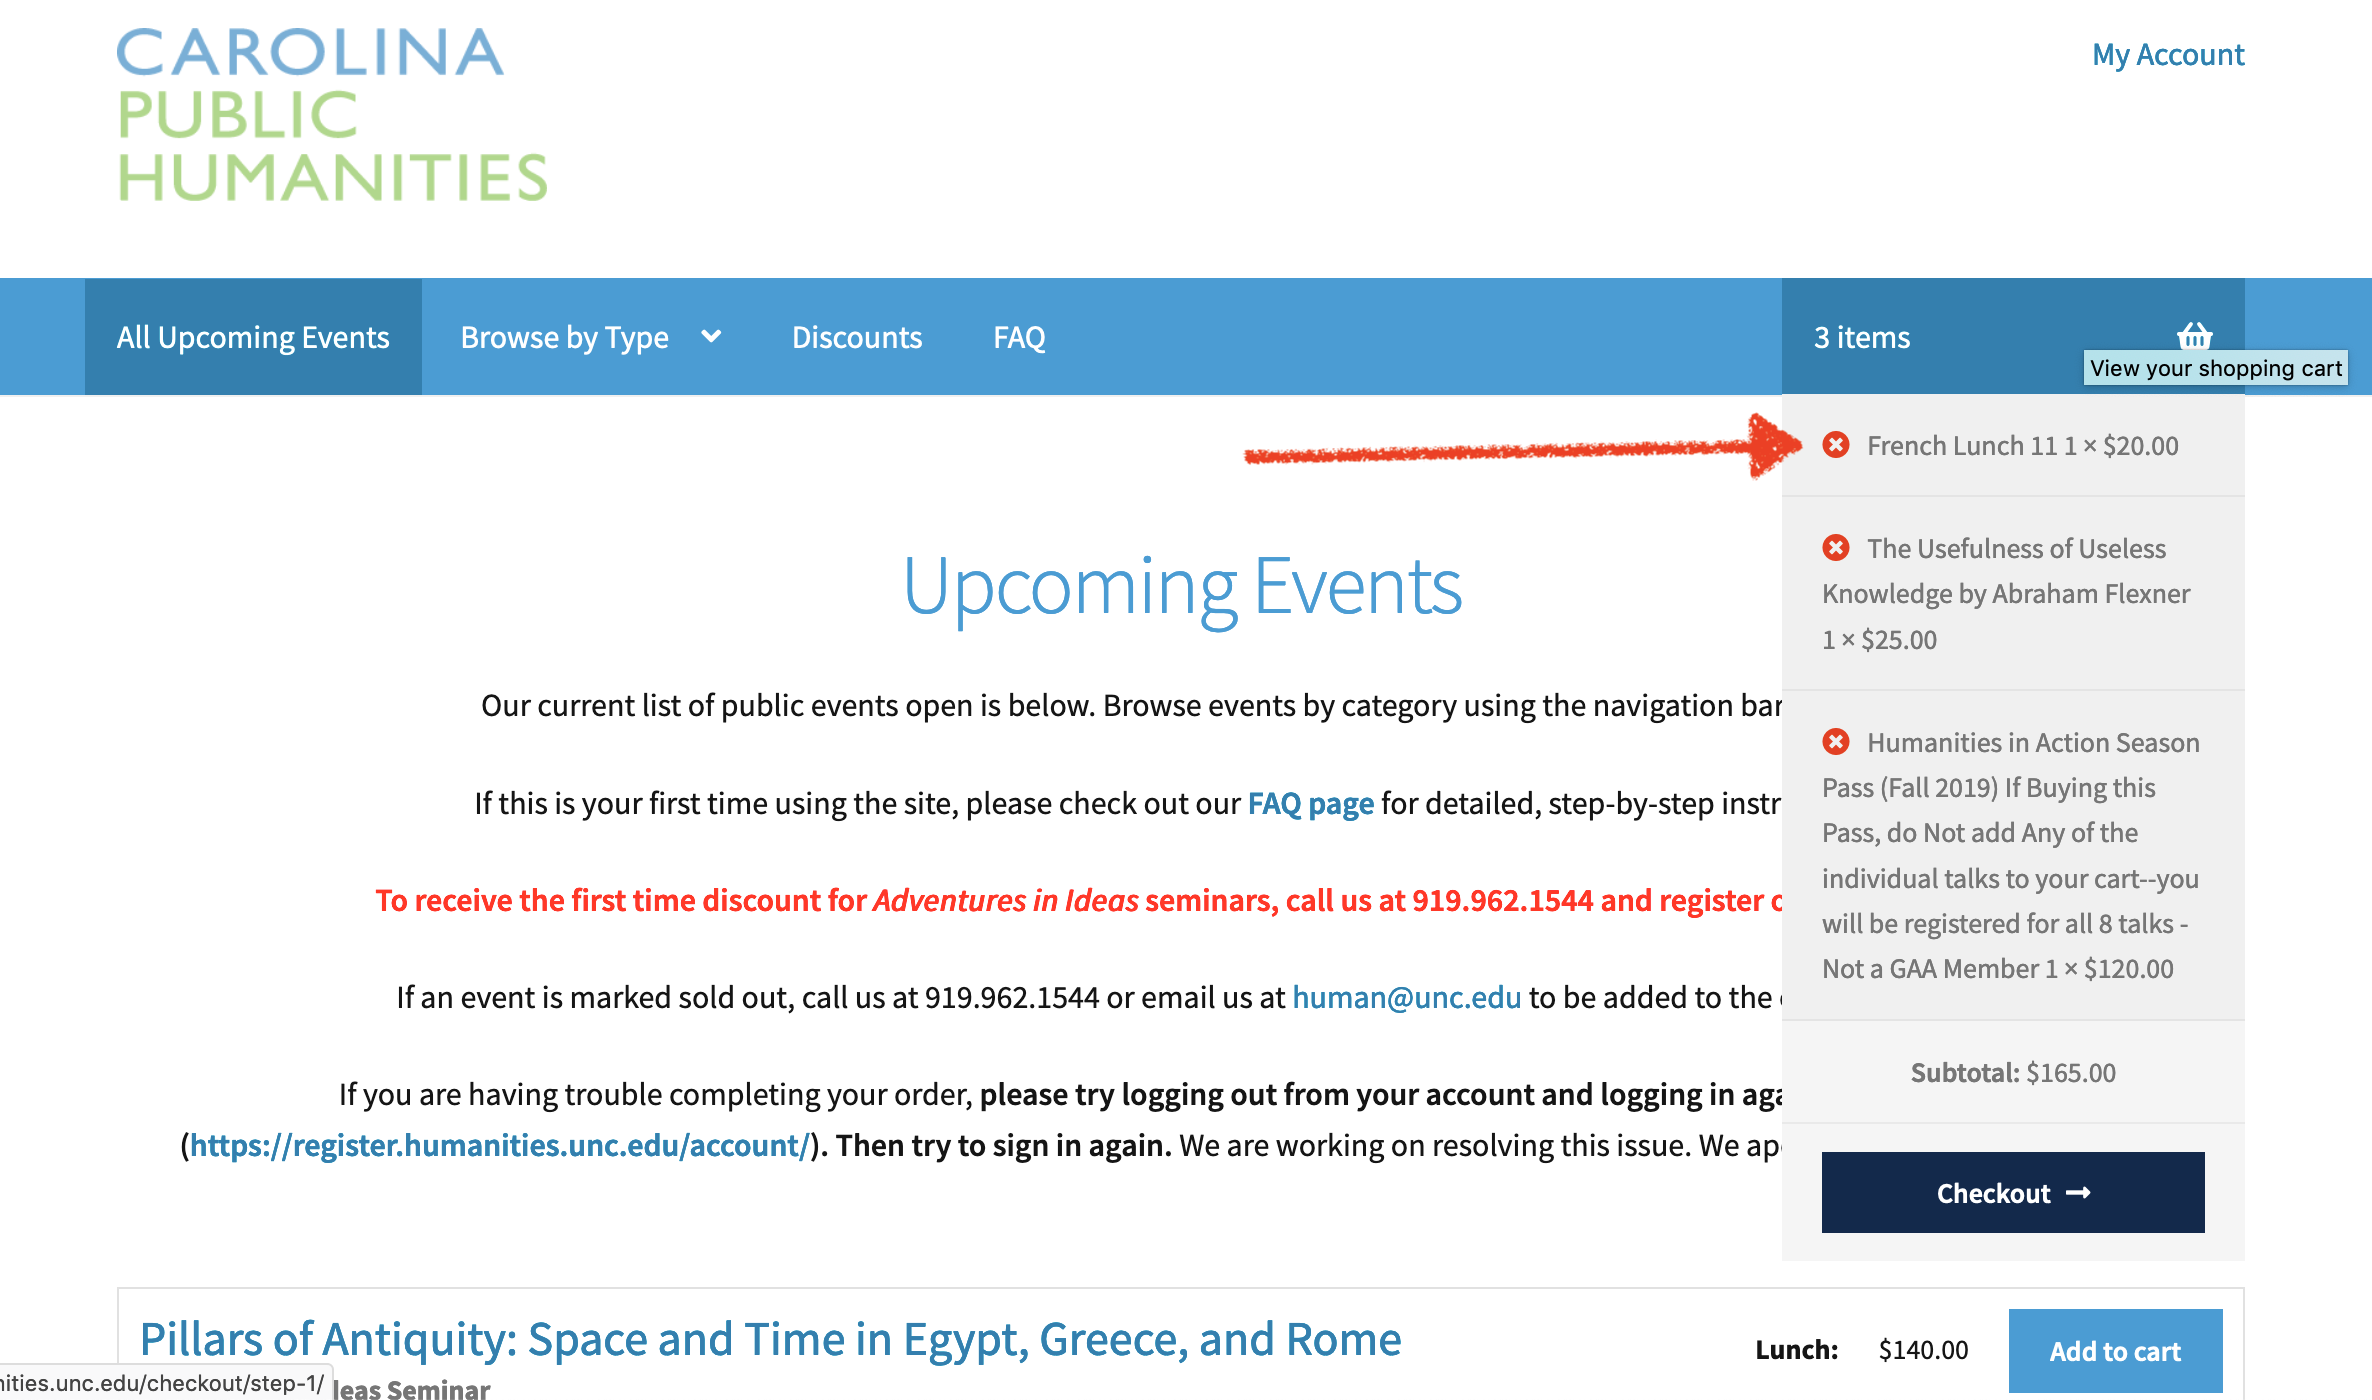
Click the red “x” and it will remove the event from your cart. Now you can continue to add additional events or proceed to the checkout page.
To check what events your registered for, click the “Account” button in the upper right hand side of the page. Click “orders” to bring up a list of your orders. Click “view” order to see what specific events you’ve registered for.

If you have any trouble, please call us at 919.962.1544.